Description
Graphics card expansion slot instruction manual
Features: Dual-screen notebook dedicated peripherals, allowing the notebook to be connected to an external high-performance desktop graphics card.
The graphics card can be replaced as needed.
Graphics card range: AMD or ATI graphics cards.
NVIDIA graphics cards must use drivers without a control panel.Please confirm before buying
The graphics card can use a driver without a control panel.
(NVIDIA's control panel does not allow laptops to use desktop graphics cards)
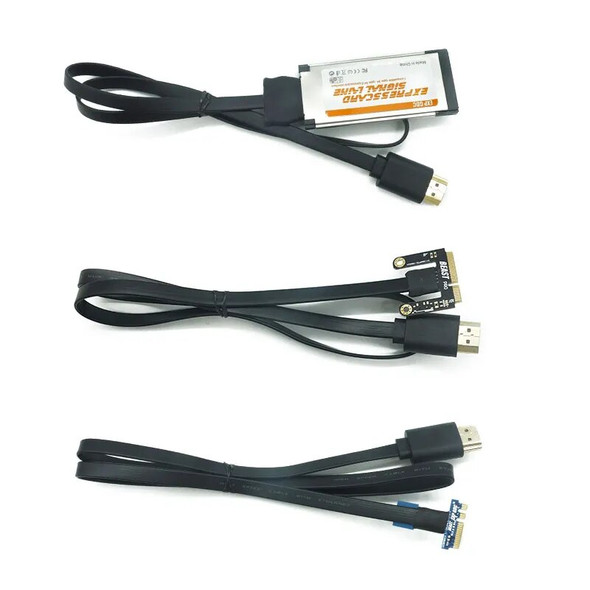
Accessories: motherboard*1, side plate*1, bottom plate*1, special cable*1, screw*8
 Installation steps:
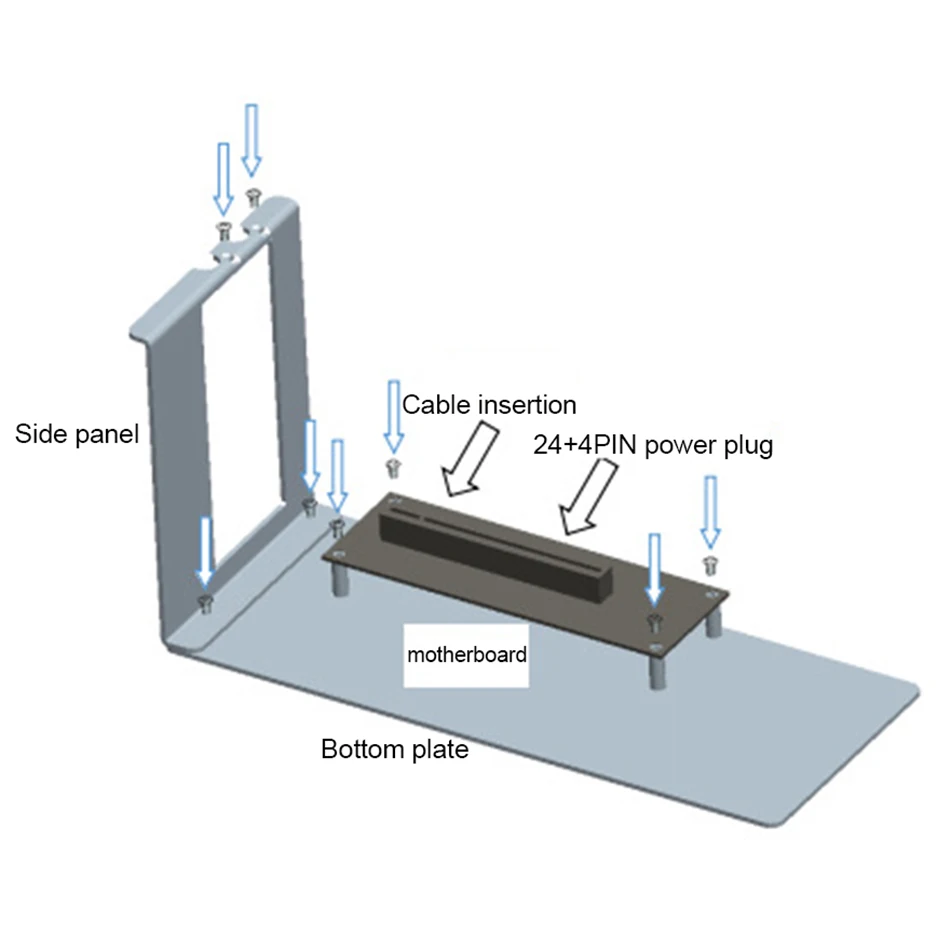
1. Align the side plate and the bottom plate as shown in the schematic diagram and lock the two screws.
2. Press the motherboard in the direction shown, align the four pillars of the base plate, and lock the four screws.
3. Insert the graphics card into the graphics card slot.
4. Lock the two screws on the upper end of the graphics card tightly.
5. Plug the power supply 24pin+4pin power cord into the motherboard power interface.
6. Insert the graphics card cable into the PCIEX8 seat, regardless of the notebook and graphics card slot ports, the plug has a positive and negative distinction, remove it, press the middle of the connector to let the buckle sink before taking it out.
7. Connect the graphics card cable to the notebook PCI-Express socket, and check that each interface is not plugged in.
8. Turn on the graphics card power supply, turn on the notebook power supply, turn on the power, and install the driver.Turn off and remove
You need to turn off the notebook first, then turn off the graphics card power, and then remove the cable


